实现场景
1、提升拉取Github代码速度
2、内网终端使用V2RAY访问外网
3、命令终端使用V2RAY访问外网
4、.....
准备工作
1、内网Centos7环境(流量转发端)
2、可访问外网服务器并部署V2RAY服务(服务端)
环境部署
安装V2RAY(服务端)
参考一键部署: http://mirrors.itan90.cn/v2ray
若已部署可忽略
安装V2RAY(客户端)
[root@localhost ~]# yum -y install gcc gcc-c++
[root@localhost ~]# curl -O https://raw.githubusercontent.com/v2fly/fhs-install-v2ray/master/install-release.sh
[root@localhost ~]# bash install-release.sh
配置文件
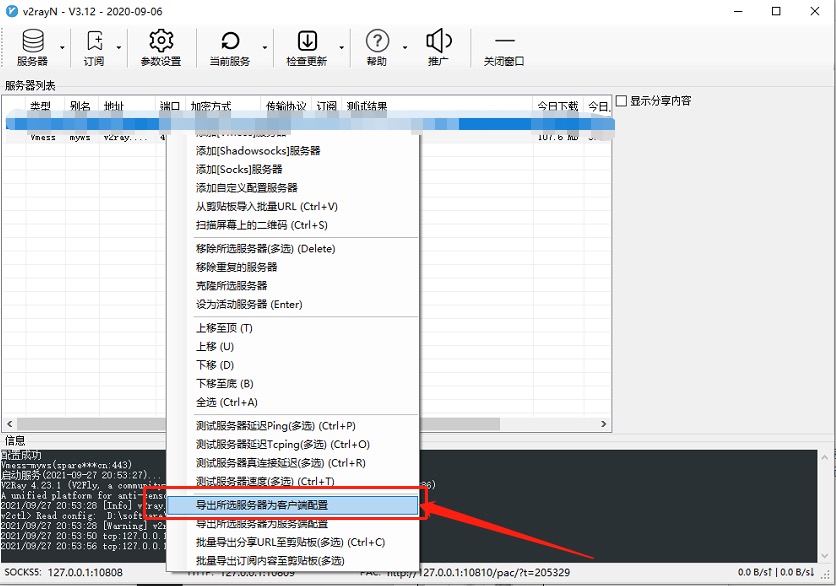
在此处安装的V2RAY作为客户端使用,配置文件与SERVER端没有太大差别(都是用的/usr/local/etc/v2ray/config.json配置文件),可通过直接导出Win/Mac客户端配置使用。

[root@localhost ~]# vim /usr/local/etc/v2ray/config.json
 # 粘贴导出的JSON配置
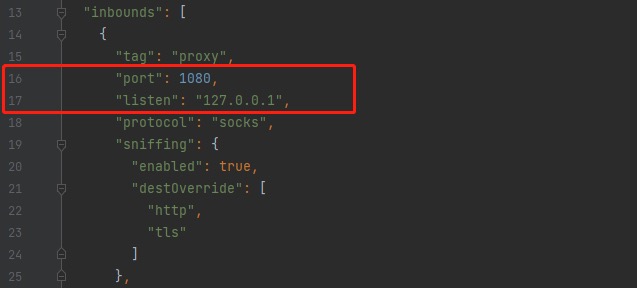
这里需要注意下json文件中的两个配置:
1、inbounds下的port字段为V2RAY客户端运行端口
2、inbounds下的listen字段为V2RAY客户端运行端口

后面Privoxy会用到。
启动服务
[root@localhost ~]# systemctl enable v2ray
[root@localhost ~]# systemctl start v2ray
[root@localhost ~]# systemctl status v2ray
安装Privoxy
安装配置
[root@localhost ~]# yum -y install privoxy
[root@localhost ~]# vim /etc/privoxy/config
# 修改
listen-address 0.0.0.0:8118            # 流量转发监听地址及端口
forward-socks5t / 127.0.0.1:1080 .     # V2RAY客户端地址及端口
启动服务
[root@localhost ~]# systemctl enable privoxy
[root@localhost ~]# systemctl start privoxy
[root@localhost ~]# systemctl status privoxy
客户端使用
# 配置代理环境(临时生效)
[root@localhost ~]# export http_proxy=http://流量转发端IP:8118
[root@localhost ~]# export https_proxy=https://流量转发端IP:8118

# 查看本机外网IP(确认是否为国外IP)
[root@localhost ~]# curl ip.sb

# 配置代理环境(永久生效)
[root@localhost ~]# vim /etc/profile
export http_proxy='http://流量转发端IP:8118'
export https_proxy='http://流量转发端IP:8118'

[root@localhost ~]# source /etc/profile